📄 Custom PDFs for the Reader, Downloads, and Document Exports
Slate provides several different options for displaying information to an end user. For instance, a portal can be used to show various pieces of information in the Reader. Even simpler is turning on an auto PDF generation of the desired info.
But when information is gathered via a Slate hosted app widget, the auto PDF option fails to pull in data. A custom PDF is one of the options that can be used in this scenario. Though a Reader portal is likely to be an easier solution, they too have some limitations. A PDF can be mass exported directly to your document management system while a portal cannot. Similarly, when the auto PDF cannot be used, a custom PDF is the best option for showing data in an Applicant Download.
The Technolutions Knowledge Base has more introductory information on custom PDFs.
Determine PDF Content
Likely the hardest part of creating a custom PDF is determining what exact information needs to be shown. You will save yourself the tedium of continually re-drafting your PDF if this can be determined before you create your first draft.
Creating a proof-of-concept is an exception to this; occasionally you may need to determine that certain information can be successfully displayed using the PDF approach. A simple PDF that is intended only to show the results of a test merge query may occasionally be helpful as a first step.
Here are some helpful things to ask yourself before you begin crafting your PDF:
- Will your PDF need to show multiples of the same category of information (e.g. family members)?
- If so, what is the maximum or likely maximum number of that category that you need to be prepared for? For instance, if you are displaying employment history, it might be possible for an applicant to provide eleven different jobs; how many will truly be relevant for your review process? You might need to be prepared to show all eleven, but maybe only the most recent six or three are germane. Three could probably be shown on one page but all eleven would require multiple pages.
- Will you need to display text or some other information, such as a Yes/No or checkbox?
- What parts of the information can change and what will always stay the same (e.g. if the PDF is used to display acknowledgments of legal notices, the text of the prompt questions can be pre-populated on the PDF. See the References PDF example below for an example)?
Create the PDF
For the purposes of this guide, we assume you are trying to create a PDF that blends in with or mimics the auto PDF. Even if that is not your goal, the below should remain helpful as a starting point.
-
At a minimum, you will need to create a blank PDF outside of Slate. But we highly recommend doing the bulk of the PDF creation work prior to uploading into Slate as the Slate PDF editor interface only provides a limited feature set. For example, it doesn’t allow aligning forms to the text or each other nor can you use it to copy a form and paste a second instance of it. It also cannot add text directly to a PDF.
Most office suites are perfectly capable tools, Acrobat is not necessary. You should already know what your PDF needs to include; now determine a usable layout in Word/Writer/{insert your favorite document editor here}. -
Start with a heading to clearly show what information should be seen.
-
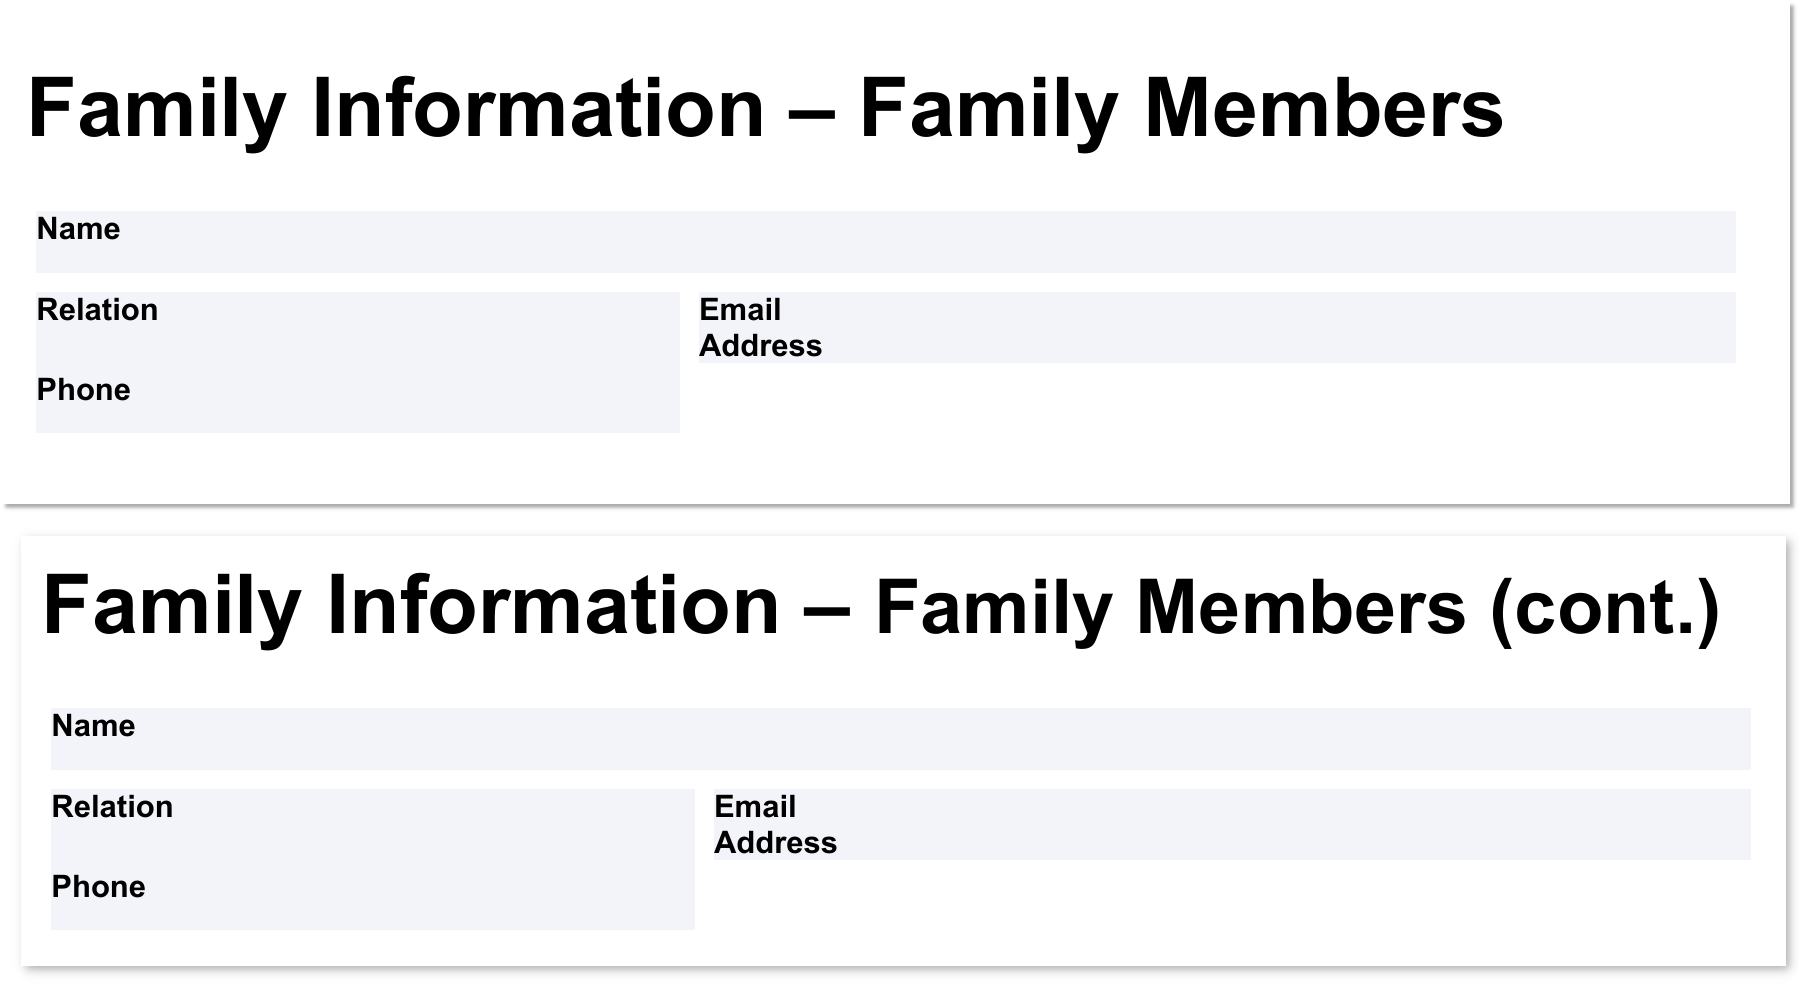
Figure out your information layout. In general, dual columns with many rows will most closely mimic the auto PDF but sometimes a variety of columns and rows might be better. It can often be useful to give each item of information its own row. Play with it until you find something that works well. Here is an example of a repeating layout showing basic Relation information:
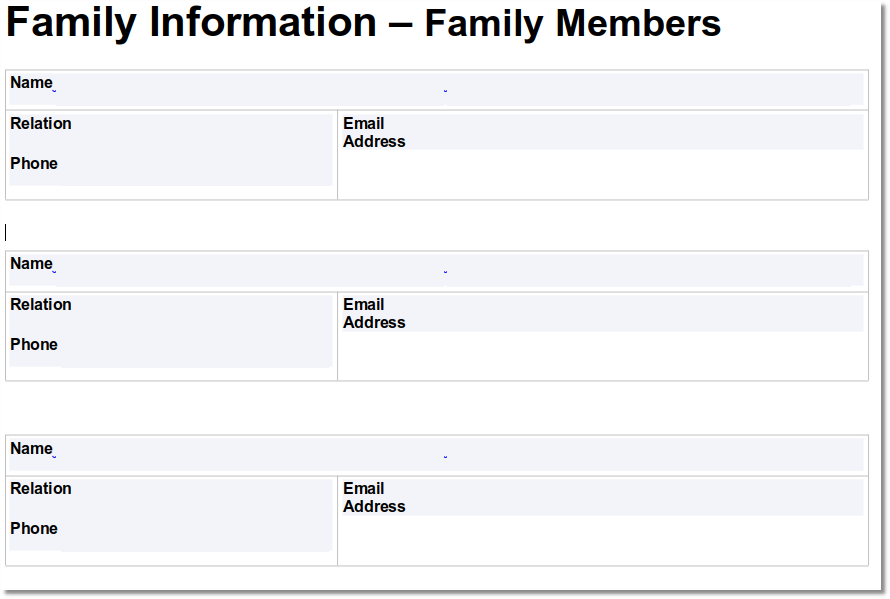
This example can be repeated across multiple pages as needed to show any number of Relations. Each page will conditionally show, provided at least one data point is populated on that page. (See Notes on Display Logic below.)
-
Create a form for each separate piece of information to be displayed and pair it with a label or the relevant question/prompt (see examples above). Consider hiding the form borders and/or background. Let the word processor help you; make one form that fills the cell, apply the desired design features, and then simply copy it over to each of the other cells. Here is an example of a simple dual-column layout with forms and checkboxes:
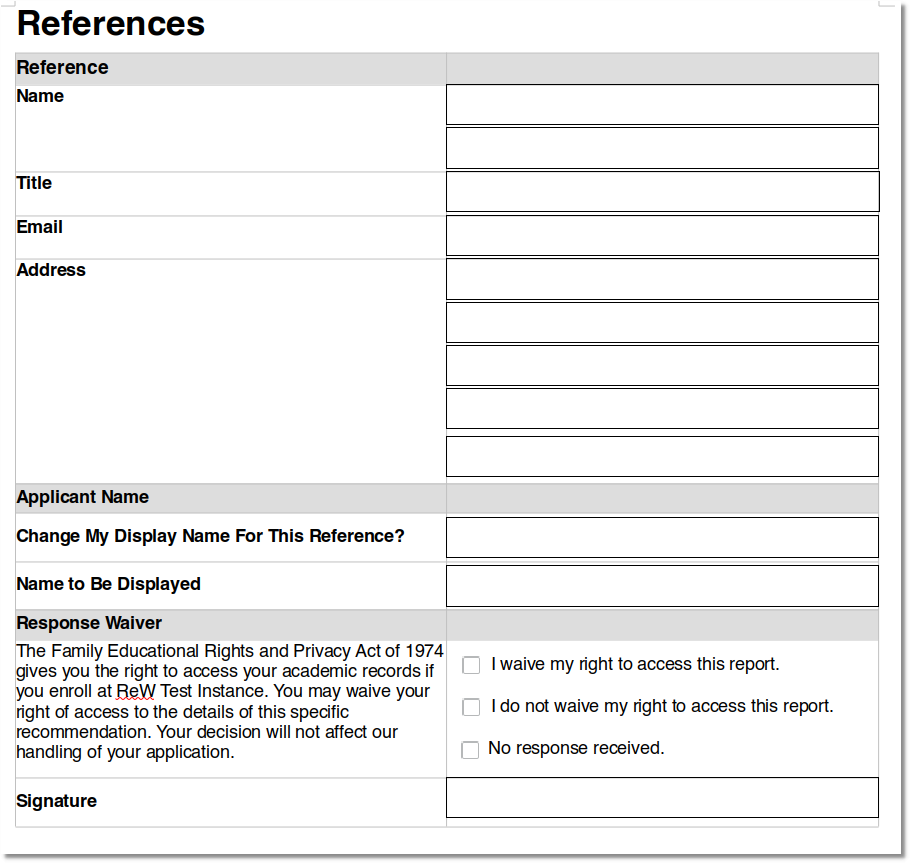
Each blank textbox here is a separate form. The forms are shown with black borders for visibility but blend better visually if the borders are hidden/set to white.
Slate will use each form's name to determine which data populates which form. If you already know the export names for each data point, copy each name to the appropriate field. Otherwise, return to name the forms after you have prepared your merge query. (Note the warning below regarding duplicate forms!) -
As can be seen in the example above, you are not limited to text forms. Check-boxes, for instance, can be used and populated in Slate by means of a bit-field export (see the Merge Query section below).
- Finally, once your document is done, export it as a PDF.


Prepare the Merge Query
All merge queries for custom PDFs must be built on the Configurable Joins – Application base!
Some exports are available out of the box but usually a Merge Query is needed to show the desired data. The basics of creating a Merge Query are available on Technolutions' Knowledge Base along with an overview of queries in Slate more generally.
- Build your merge query on the Configurable Joins – Application base.
- Select the "Sharing" box.
- Place the query in the System folder.
- Set the System Key to Merge. (This option is only visible after first saving the Query.)
- We also recommend using the Description section to document which custom PDF this query powers with as much contextual information included as possible. (Some of the information may have to be added once later steps are completed.)
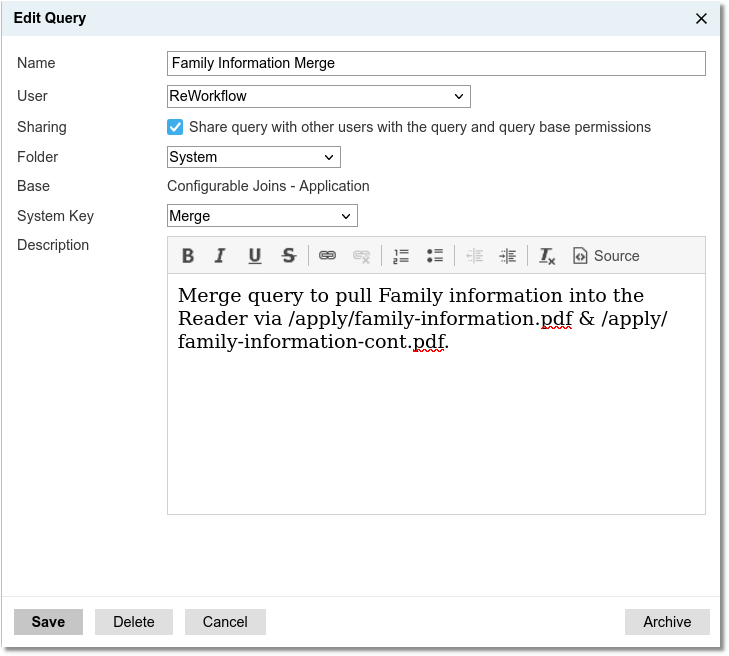
An example of a properly configured Merge query with a contextual description.
- Add a separate export for each piece of information you need to display.
- Name each export in the merge query with a unique name. That name will be added to the relevant PDF form. The out-of-the-box exports can also be used as PDF form names.

When naming your exports, take care not to use a pre-existing name. If an export name is identical to another Merge Query export or to a standard merge field, it will be treated as a comma separated concatenation on the PDF.
Export Tips
The most basic export for custom PDFs is the text-based export by which the value of an address, program selection, ethnicity prompt (etc), or free text entry is passed to the PDF.
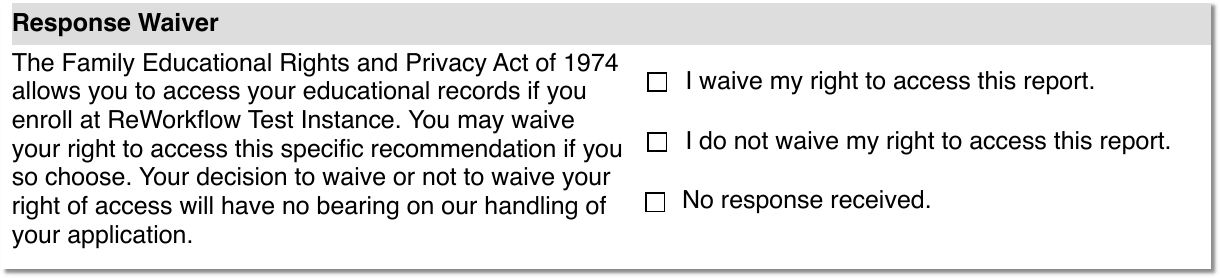
But bit-style exports can be quite useful as well, especially when using check-boxes. Typically for check-boxes, you will want to create an existence export and leave one value option blank/null. In the example below, three exports are required to conditionally populate the correct checkbox; the third box is populated via a Not Exists value when the underlying field is filtered for either a 1 or 0 response.
Upload the PDF
Be Aware!: While Slate will allow you to define multiple instances of a form on a custom PDF (i.e. multiple identically named PDF forms), it absolutely will not allow a script to be applied to any of said duplicates. Any script will be cleared upon upload/saving the PDF in Slate.
- Upload your PDF into Slate via Database->Files->Upload File.
- Name the PDF something appropriate (e.g. /apply/references.pdf).
- Once the PDF is uploaded, open it in the PDF Editor.
- Double check that all your fields have the correct field name & then click Save.
Steps 3 & 4 are REQUIRED in order to set the default font on the PDF forms. Failure to open the PDF in the Slate Editor & save it will result in incorrect formatting of export data.
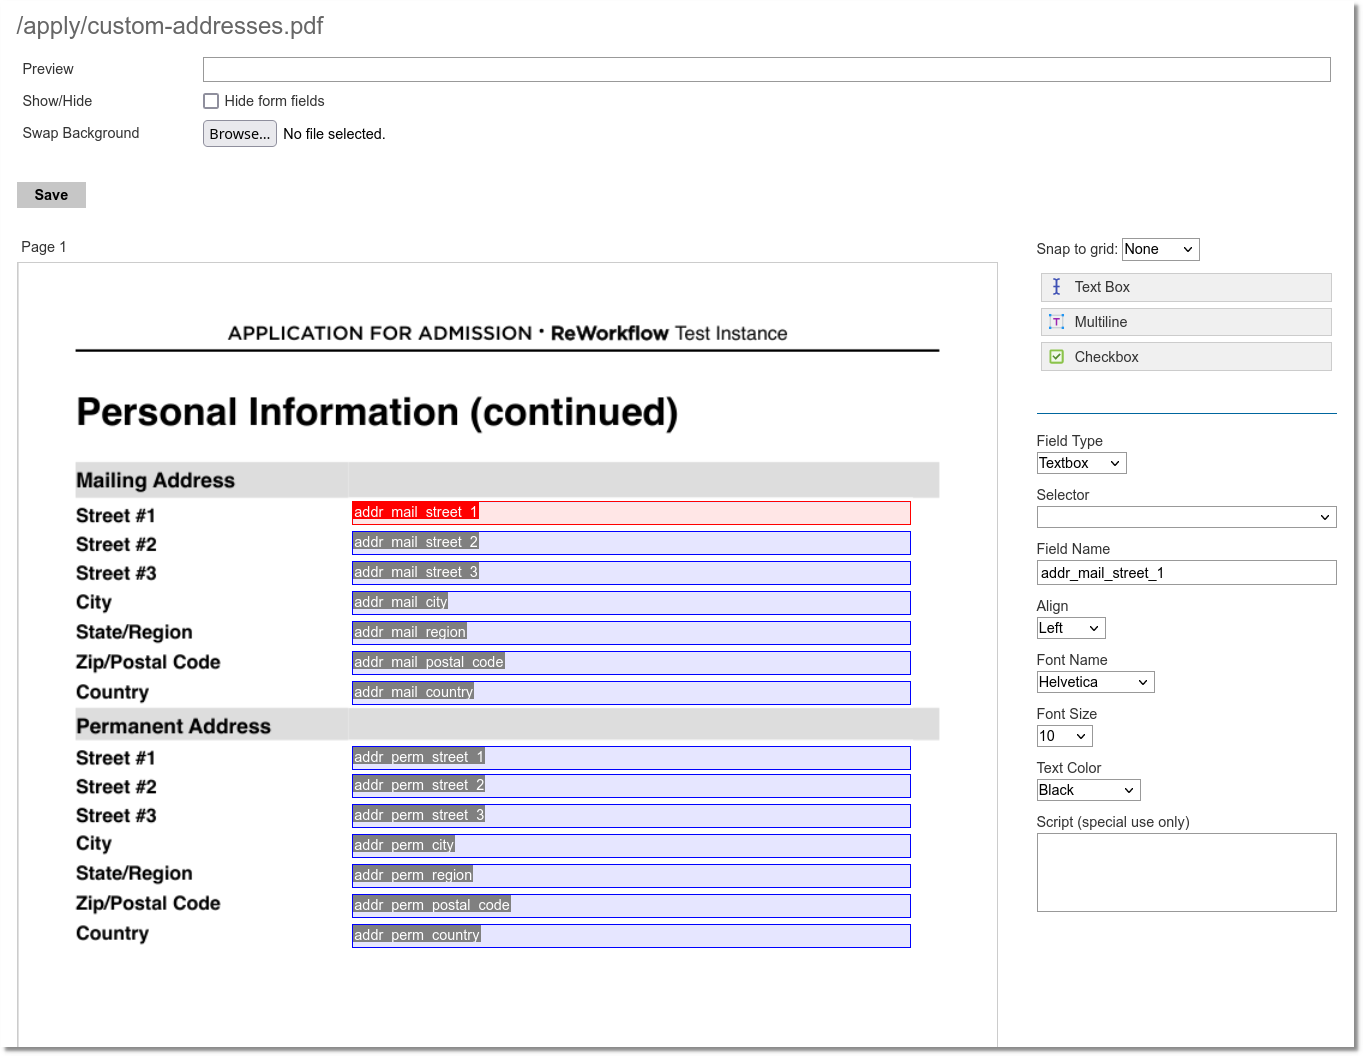
An example of the PDF editor showing a simple address PDF opened for editing.
Show in Legacy Reader
Once the PDF is uploaded as a file, you can add it into your Reader. This guide will assume Reader is already configured/active in your instance and that wish to show your PDF as part of the Application tab; to show it elsewhere, simply adjust the Tab and Type selections below. If you are configuring the Reader for the first time, it is highly recommended to use a Workflow instead of the legacy Reader tools (see "Show in Workflow" below).
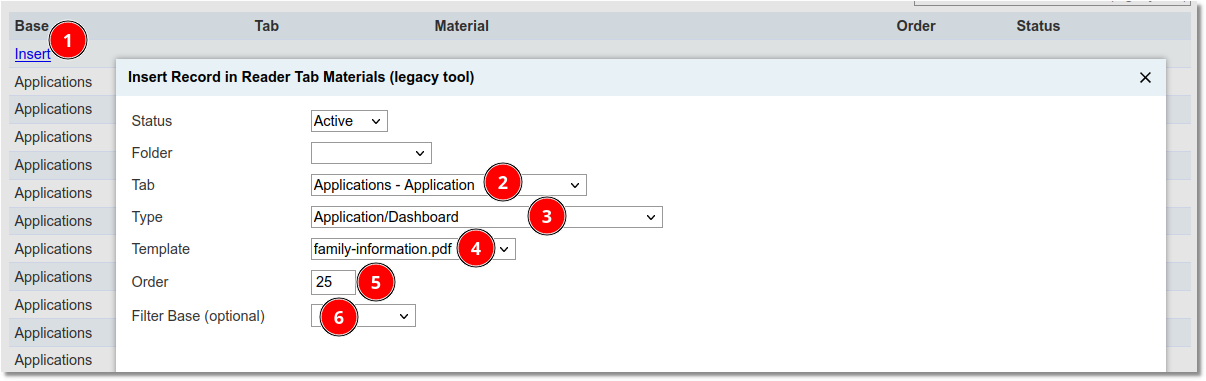
Navigate to Reader Tab Materials (legacy tool) (Database → Reader and Decisions → Reader Tab Materials (legacy tool)).
- Select Insert.
- Set Tab to whatever your instance name for Application is (e.g. Applications – Application).
- Set Type to Application/Dashboard.
- Select your PDF in the Template dropdown.
- Set where in the application you want it to show with Order.
- The Filter Base may be used to conditionally show the PDF in addition to the filters on your Merge Query (recall that a custom PDF will only show if it has data to display).
- Save your changes.
Your PDF should now be active in the relevant portion of the Reader!
Show in Workflow
Custom PDFs can also be used in Workflows. The following assumes you already have a Workflow set up.
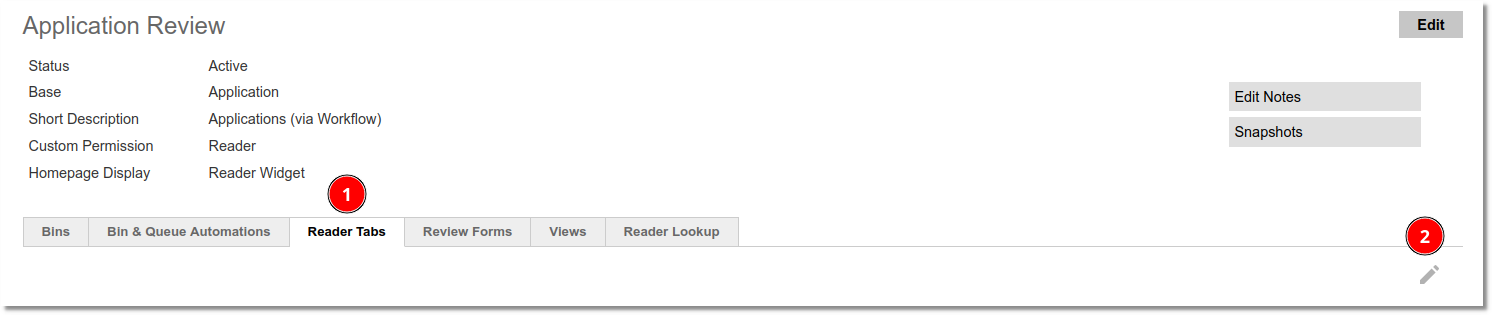
Open your Workflow (Database -> Workflows) and select "Reader Tabs" then select the "Edit Reader Tabs" pencil.
If you have existing Reader Tabs configured, they will show as a column. Custom PDFs require a Materials-type tab; either add a new Materials tab or select the "Edit Materials" icon of an existing tab.

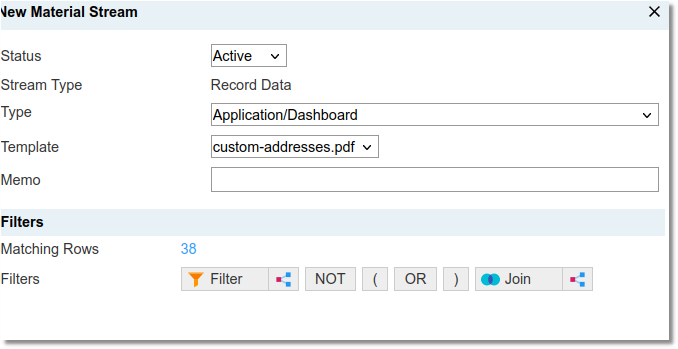
Now add a new "Record Data" item to the tab.

Configure it as follows:
- Status: Active
- Type: Application/Dashboard
- Template: {your custom PDF}
- Memo: {optional}
Additionally, filters may be added here to customize where and when the custom PDF is displayed. Save your changes.
Your PDF should now be active in the relevant Workflow!
Notes on Display Logic
There are a number of ways to determine and control when a PDF is shown or not shown.
- When there is no data to populate on a PDF, the PDF will not be displayed.
This can be very useful when dealing with an unknown amount of repeating data (such as family members or academic history). Craft a PDF with repeating blocks for data and add multiple instances in Reader Tab Materials or the Workflow Reader Tab. You may find it helpful to create two PDFs files, one initial and another for repeating pages.
The repeating PDF will then be uploaded multiple times & the form names updated as many times as necessary to show the likely maximum number of items. (The relevant merge query will also need to have the relevant exports duplicated as many times as necessary.)
Be sure to test carefully when using method #1. Some exports can cause PDFs to display even in the absence of populated data. In particular, check sub-query exports set to concatenate data.
If you experience this behavior, add an existence filter to the query. - Really an extension of #1 above, filters within the relevant merge query can be used to exclude specific data and therefore prevent the PDF from having data to populate in certain situations.
- In the legacy Reader, filters can be applied directly to the Reader Tab Material. In a Workflow, they can be added on either the entire Reader Tab or on the specific material within the tab. This is a good option for showing only on Test records (for instance when performing tests of the custom PDF.)
- A PDF can be forced to show in any situation it is not otherwise explicitly blocked by adding an export that always populates. A system date or literal export are good options for this.
No comments to display
No comments to display